Creating The Front Center Shell Section

The front center section of the turret is probably the most known image as we see many photos of it with the gunner in the window. The front section is where the gunner has his sight and focuses his energy on eliminating incoming targets that attack the aircraft in his field of view. There is a fire cut-off switch that is mounted under the belly of the plane connecting the turret horizontal trunion system. The bottom line is this will stop the firing of the guns automatically when they enter a determined line of fire that would endanger the aircraft or engines.


The recovered part of the Lower Turret front section is comprised of 18 separate pieces. All of these are epoxyed together and reinforced at places with metal or iron rods, such as the center window and side frames.
Here is a section of the front section frame that is attached to the lower and upper seat brackets, note the new bolts. There are three frame pieces here.

The front window frame spine is reinforced with a metal sheet and epoxy as well as riveted to the frame. Cosmetic fixing is with metal spackle that also adds strength. The is a very weak spot in the section as it connects the round window with the bottom of the section and is one of three frame parts that share the most force. The entire open frame area including the round window is lined with an iron rod.


Noticed are white numbers on each piece, these are the artifact numbers for tracking in the database as to what the part number is, where it was found, what the name of the part is, and reference in the parts catalog and manufacturer name plus added info as to its condition, particulars, or status.

A small portion of the window frame was missing, therefore a small reconstruction was done to reinforce the frame as well as fill in the missing gap. The base for the reconstruction is fiberglass and resin, topped with metal filler. Last painting to match and aging a bit.

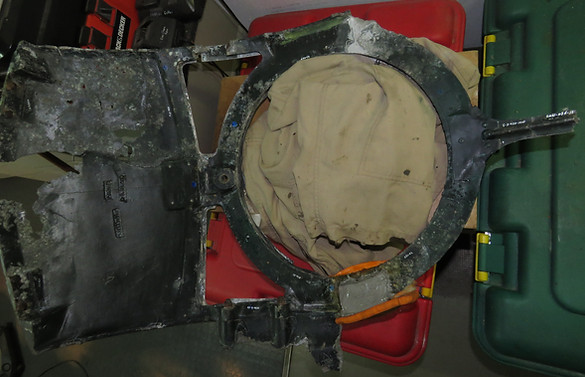
In this photo, the round frame is set with an iron rod around it. It is put on the inside where the original window rubber went.
Here the rods can be seen in the frame on the sides and lower windows. They match the shape as much as possible and are fitted very tight inside the frame with 10-ton epoxy. Some frame parts are welded together as well.

